OpenDive
A non commercial project by Stefan Welker
OpenDive - free DIY 3D VR glasses by using your 3D printer. The following is the story how I came about designing them.
How I built the OpenDive
When I saw what 3D gaming products were available and what will be available in the near future, I decided not to wait for someone to build what I want for me but to try and build my own 3D goggles. I realized that my smartphone contained all the necessary components including motion sensors, that would enable head tracking, to look around freely in a 3D environment. So I took the phone and my skiing goggles, and built the first prototype from it. What I ended up with were inexpensive homebrew 3D goggles that allowed me to play 3D games without any wires or additional hardware except a gamepad for navigation.
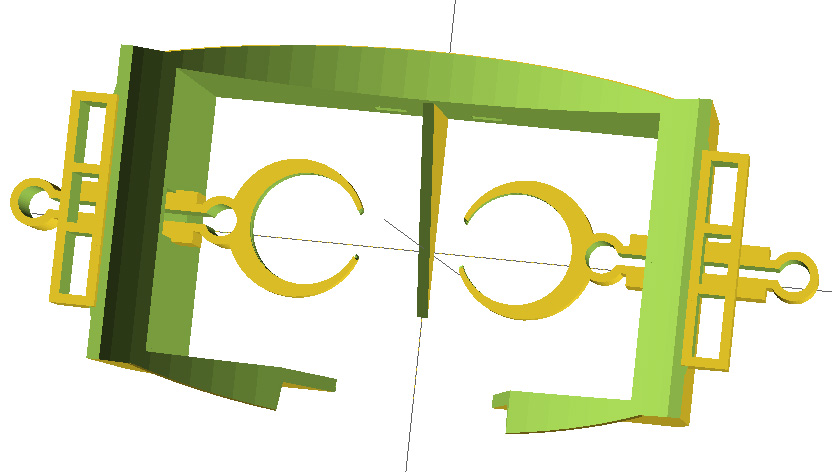
I designed a frame to hold the phone that can be printed on a 3d printer. If you have access to one, just print it out yourself. The video on the right shows the few necessary steps to assemble it.
OpenDive files
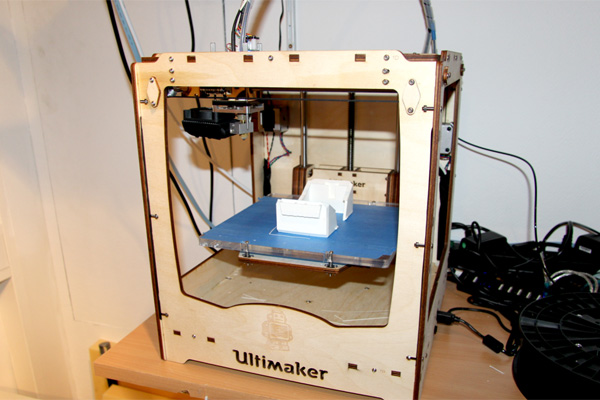
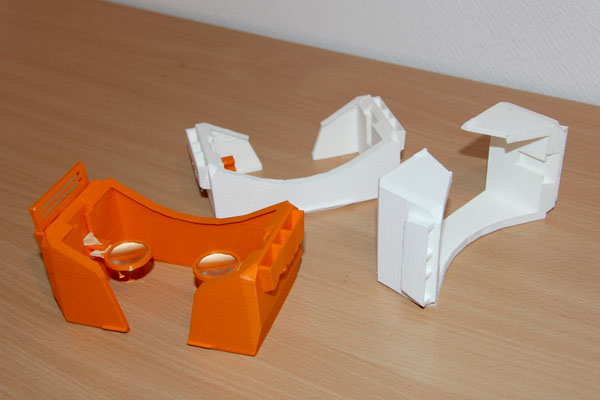
OpenDive can be printed out using a regular 3D printer such as Ultimaker or MakerBot.
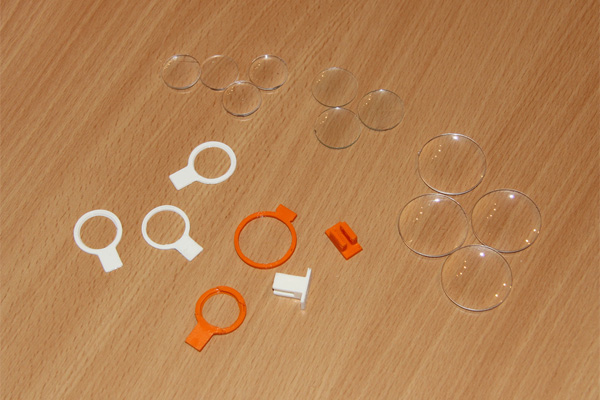
In addition to the printed frame, you need lenses and a headstrap which you can get by buying the OpenDive lens kit.
Drawing it
I started modelling the frame in Wings 3D, an open source polygon modeler but later switched to OpenSCADa non-interactive solid modeler that lets you create models by code.
OpenDive and work based on it are released free for non-commercial use. The models for printing can be downloaded here.
Printing it
I used my Ultimaker 3D-printer to print the model. This printer is rather inexpensive but still produces very accurate print outs. Printing one frame takes several hours.
Choosing lenses
Update: We now offer an inexpensive OpenDive Lenskit specifically compounded for OpenDive at our shop.
The first lenses I used were from cheap binoculars, that I bought on ebay. I then tried lenses in different sizes and with different focal lengths until I found ones that met my requirements. The goal was to find lenses with a magnification that produce a large field of view on the one hand an that are on the other hand large enough to allow for small misalignments of the eye to the optical axis of the lens without too much distortion.
The game
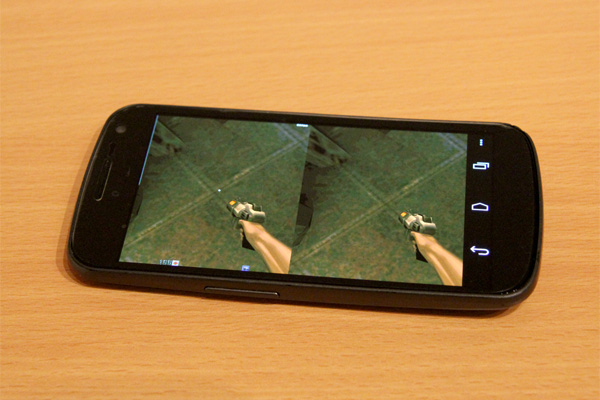
As game I used an Android port of the famous game Quake II. The source code is available as open source and I modified it to show two imges side-by-side from slightly different angles and integrated the motion sensor data from the phone, so that you can look around in the game when you turn your head in real life. I used my background in robotics to program a motion prediction so that head movements are performed instantly in the game.
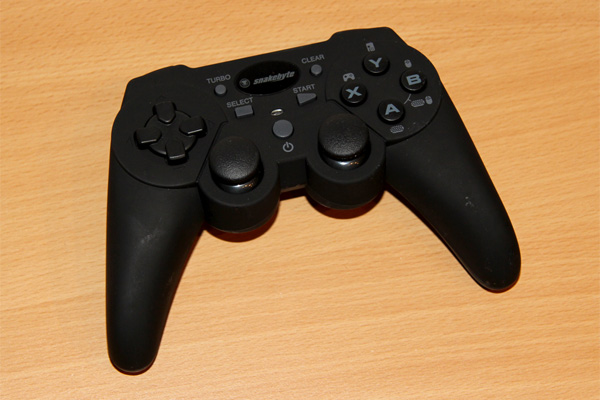
As the motion sensors only allow for the rotation of the player in the game, an external controller is necessary to run forward. One controller that works with Android is the snakebyte idroid:con controller, which can emulate a keyboard.
NativeSensors
For Playing you need these two packages and a Bluetooth keyboard or a gamepad:
Native Sensors (apk, 2013-05-14) and Quake2 Side-By-Side Android (apk, 2015-10-13)
There is also a Quake2 keyboard configuration file which can be placed to the baseq2 Folder:
Quake2 Android keyboard configuration (cfg, 2013-05-30)
You can also download the Quake2 side-by-side source code:
Quake2 Android GPL source code (tar.gz for developers, 2013-04-15)
For further information you can check the video tutorial on the right side:


Meet the
Accepted payment methods

